 It’s So Easy it’s Spooky!
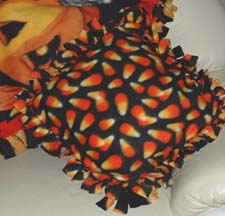
Two simple polar fleece panels come together without a single stitch to create a cuddly no-sew fleece pillow perfect for crisp fall weather — and scary stories! This is a great family craft project. Anyone who can tie a knot can join in!
Match it with our No-Sew Fleece Throw! It’s just as easy to make.
But it’s not just for Halloween. With the great variety of polar fleece patterns and pre-printed panels available, you can do this fun craft project for just about any occasion, from Christmas to baby showers. It’s quick, easy and really impressive — even for the most craft-challenged among us!
Materials:
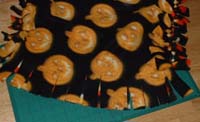
 2 Polar fleece squares cut to the same size, we chose two patterns with spooky jack-o’-lanterns (from Jo-Ann’s Fabrics and Crafts)
- To cut the fleece squares, measure the pillow form size and allow 4″ on all sides for the fringe. Example: for a 16″ pillow form, cut 2- 24″ squares
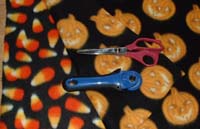
- Scissors or Pinking Shears
- Rotary fabric cutter (optional)
- Cutting pad (optional)
- Ruler
 Pillow form
Step 1
Measure your pillow form and cut the two fleece panels, allowing 4″ all around for cutting 4″ fringes – Example: for a 16″ pillow form, cut 2- 24″ squares. We cut the panels to size using pinking shears to get a jagged edge.
Note: Polar fleece stretches one way and not the other, make sure both panels stretch along the same length when cutting.
 Step 2

Align the two panels together, back to back, and cut fringes down one side, through both fabric thicknesses. We used a rotary cutter, but scissors are fine, too. We cut fringe 4″ long and the width of our ruler (1-1/4″). Fringe cut to about 1″ to 1.5″ in width works best for this craft project.
Note: When you get to the corners, you will cut the corner square completely out.
Step 3
 Starting on one end of the cut fringe, tie together one front fringe with one back fringe, tightening the knot so it holds the front and back panel securely together. A square knot works best. Tie them all in the same direction (right over left, left over right) for a consistent finish. Continue tying knots down the full side.
Step 4
Repeat Steps 2 and 3 on the other two sides, leaving one side open. Insert the pillow form and knot the fringe on the remaining side. Curl up and enjoy!